
1. You should start by creating a Namecheap account. Simply click on the 'SIGN UP' link (in the toolbar at the top of the page) and fill out the sign-up form. It's up to you what information to enter into the registration form but be aware that there's no KYC or ID process for Namecheap account registrations. In any case, be sure to use an email address that you have access to. When you're ready, click on the 'Create Account and Continue' button.

2. Once you're account has been created, you'll be taken to your account dashboard. There, use the search box to see whether your desired domain is still available.
3. If the domain is still available, click on the 'Add to cart' button and then on the red 'Checkout' button.

4. (Skip this step if your domain was available.)
If your desired domain is no longer available, you have two options: You can either think of a different SLD for your identifier or you scroll down the page and select a different TLD. You can use the 'Beast Mode' tab to quickly and easily search hundreds of TLDs.

5. On the shopping cart page, you will see a summary of your domain order. Be sure to double-check the domain name and also ensure that the free 'Domain Privacy' feature is set to 'ENABLE' (you do not have to enable 'PremiumDNS').

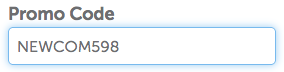
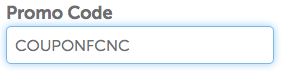
6. If you're registering a .com domain, type 'NEWCOM598' into the 'Promo Code' field (and click on the 'Apply' button) to get a big discount on your domain registration fee. If you're registering a different TLD, go to this page to find other discount codes. If there are none available for your TLD, try using the code 'COUPONFCNC'.
7. If you'd like to pay with Bitcoin, go to this page to top up your account funds with a Bitcoin payment. Please note that Lightning payments are currently only accepted through bitpay. Check your cart (in the toolbar) for your order total, enter that exact amount into the 'Amount to Add' field and click on the 'Add Funds' button. Now pay the Bitcoin invoice.

8. Your new account balance will appear at the top of your dashboard as soon as the payment transaction has been confirmed. Once it does, return to your cart and click on the 'Confirm Order' button. On the next page, in the 'Payment Method' section, select the 'Account Funds' option and continue the checkout process. On the last page, review your order and click on the 'Pay Now' button.

1. Go to your Namecheap account dashboard (if you don't have a Namecheap account, slide 1 of Step 2 explains how to create one). Now place your cursor over the 'Hosting' link and click on 'Shared Hosting'. On the next page, locate the 'STELLAR' plan and click on the red 'Get Started' button.
2. You will now be asked which domain should be connected to your hosting plan. Select the options 'Existing Domain Name' and 'Your Namecheap Domain Name'. Type your domain into the search box, select it and click on the 'Connect To Hosting' button. Now click on the 'Add To Cart' button.
3. On the shopping cart page, you will see a summary of your hosting plan order. In the 'Promo Code' field, type 'COUPONFCNC' to get a 20% discount on your hosting plan. Now click on the 'Confirm Order' button.
4. If you'd like to pay with Bitcoin, go to this page to top up your account funds with a Bitcoin payment. Please note that Lightning payments are currently only accepted through bitpay. Check your cart (in the toolbar) for your order total, enter that exact amount into the 'Amount to Add' field and click on the 'Add Funds' button. Now pay the Bitcoin invoice.
5. Your new account balance will appear at the top of your dashboard as soon as the transaction has been confirmed on the Bitcoin network. Once it does, return to your cart and click on the 'Confirm Order' button. On the next page, in the 'Payment Method' section, select the 'Account Funds' option and continue the checkout process. On the last page, review your order and click on the 'Pay Now' button.
1. First, you'll have to configure your domain's 'nameservers'. Go to your domain registrar and navigate to the settings/management page of your newly registered domain. If you used Namecheap to register your domain, click on this link and then on the 'MANAGE' button.

2. Locate the nameserver settings and set them to those of your hosting provider. If you don't know what they, simply google the name of your hosting provider plus the word 'nameservers' or contact your provider.
3. Now go to your hosting plan dashboard and from there, open your control panel (often called 'cPanel').

4. On your control panel, locate the 'DOMAINS' section and click on 'Addon Domains'.

5. Type your newly registered domain in the 'New Domain Name' field and click on the 'Add Domain' button.

1. From the home page of your hosting plan dashboard, open your control panel. If you're using Namecheap, go to your account dashboard, click on the 'Hosting List' tab and then on the 'GO TO CPANEL' button.

2. In your control panel, locate the 'FILES' section and click on the 'File Manager' link.
3. In the file manager, open the main/root folder of your identifier domain (if you're using Namecheap and your identifier domain is your main and/or only domain, you are already in the root folder). Once you're in the root folder, click on the 'New File' button (typically indicated by a '+' symbol) and create a new file named 'index.html'.

4. Next, click on the 'Settings' button (in the top-right corner of the file manager'), activate the 'Show Hidden Files (dotfiles)' option and then click on the 'Save' button. A folder named '.well-known' will now be shown. Now (double) click on the folder to open it.
If your file manager does not have a 'Show Hidden Files' option or if there's no existing '.well-known' folder, simply create it yourself using the 'Add Folder' button (don't forget the '.' at the beginning).

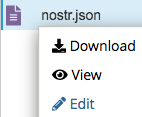
5. In the '.well-known' folder, create a new file named 'nostr.json'. Once you have, right-click on the file and then click on the 'Edit' button.
6. Open this template file and copy the code snippet it contains, then paste it into your 'nostr.json' file. Now replace 'YOUR_NOSTR_NAME' with your Nostr username and 'YOUR_NOSTR_PUBLIC_KEY' with your Nostr pubkey in HEX format. You can find and copy your Nostr pubkey on the profile page of your Nostr client. Use this tool to convert your pubkey from the npub to the HEX format.

7. Please ensure that your username is exactly the same in your Nostr profile settings and your JSON file. Also, please note that it cannot contain any spaces or non-standard (UTF-8) characters. Once you've entered your username and pubkey into the code snippet, be sure to save the JSON file.
8. In your File Manager, navigate back to the main/root folder of your identifier domain. In the root folder, create another new file named '.htaccess' (don't forget the '.' at the beginning).
9. Now open this template file and copy the short code snippet it contains, then paste it into the new '.htaccess' file and be sure to save the file.
1. If you're using Namecheap, go to your account dashboard and click on the 'Domain List' tab. Next, click on the 'MANAGE' button next to your identifier domain. On the domain details page, locate the 'NAMESERVERS' section. There, click on the drop-down menu and select the 'Namecheap Web Hosting DNS' option. Now click on the green check mark to save the new setting and continue with Step 7.

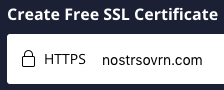
2. To register a free SSL certificate at ZeroSSL, enter your domain into the field at the top of the home page and then click on the 'Next Step' button. Please be aware that free ZeroSSL certificates must be renewed every 90 days (3 months).
3. On the next page, create a new account by entering an email address and a secure password. You can use any email address including the one you used to register your domain. Either way, be sure to use an address that you have access to because an SSL verification email will be sent to it shortly. Store your password in a safe location, then click on the 'Next Step' button.

4. On the next page, you'll see the 'SSL Certificate Setup' dashboard. In the first tab called 'Domains', make sure that your domain has been entered correctly in the white field. To the right of the field, you should see two green checkmarks, indicating that you are setting up an SSL certificate for the two versions of your domain (with and without 'www'). Now click on the 'Next Step' button.

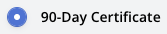
5. In the In the next tab, called 'Validity', select the '90-Day Certificate' option. Important: Again, please note that you'll have to renew your free SSL certificate every 90 days (3 months). If you don't, your identifier will stop working. Now click on the 'Next Step' button.
6. In the In the next tab, called 'CSR & Contact', make sure that the 'Auto-Generate-CSR' toggle is turned on, then click on the 'Next Step' button.

7. Lastly, in the 'Finalize Your Order' tab, make sure that the free plan is selected and then click on the 'Next Step' button.
8. On the next page, in the 'Verification Method' tab, make sure that the 'Email Verification' option is selected. The field underneath contains the email address that you used to register your domain. If your domain has privacy protection, the email address may look unrecognizable because it's encrypted. Simply leave the field as is and click on the 'Next Step' button.

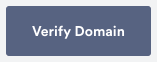
9. On the next page, click on the 'Verify Domain' button. A blue box will appear, containing this message: "An email with a verification link has been sent for each of the domains in your certificate." Now go to your email inbox. You should soon receive an email from ZeroSSL with the subject 'Verify Domains' and a reference number. This email contains a Verification Key. Copy the key and then click on the blue 'Go To Verification Page' link.
10. On the next page, paste the Verification Key into the empty field and click on the 'Next' button. You should now see this message: "You have entered the correct Domain Control Validation code. Your certificate will now be issued and emailed to you shortly."
11. You will receive another email shortly titled 'Certificate Issued'. Open the email and click on the blue 'Install Certificate' link, which will take you to the 'Install Certificate' page of your ZeroSSL dashboard. In the 'Download Certificate' tab, click on the 'Download Certificate' button. Save the .zip file in a secure location on your computer. Now click on the 'Next Step' button, which will open the 'Install Certificate' tab.

12. On your computer, open the folder that you stored the .zip file in and unzip/extract it (if you don't know how to do this, read this short guide). In the extracted folder, you will find these three files: 'ca_bundle.crt', 'certificate.crt', and 'private.key'. Now, go back to the home page of your hosting plan dashboard and open your control panel (often called 'cPanel').

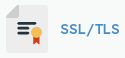
13. In your control panel, locate the 'SECURITY' section and click on the 'SSL/TLS' link. On the next page, click on the 'Configure' button next to your domain name. You should now see a page with three large empty fields named 'Private Key', 'CSR', and 'Certificate'. If you cannot find these fields, contact your web server/hosting provider to ask where they are located.
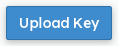
14. On your computer, go back to the folder containing the three SSL certificate files. Using a basic text editor, open the file named 'private.key'. It contains a long string of code starting with '-----BEGIN RSA PRIVATE KEY-----'. Copy the block of code in its entirety and paste it into the 'Private Key' field on the 'SSL/TLS' page. Now click on the 'Upload Key' button next to the field.
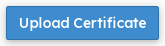
15. On your computer, go back to the folder containing the three SSL certificate files and this time, open the file named 'certificate.crt'. The code in this file starts with '-----BEGIN CERTIFICATE-----'. Copy the block of code in its entirety and paste it into the 'Certificate' field on the 'SSL/TLS' page. Now click on the 'Upload Certificate' button next to the field.
16. Finally, go back to the ZeroSSL dashboard and in the 'Install Certificate' tab, click on the 'Check Installation' button to ensure that your SSL certificate works. If not, wait a few minutes and check again until the 'Installation Complete' tab shows a green check mark.

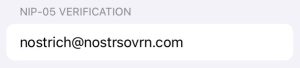
1. In your Nostr client, go to your profile settings and enter your identifier into the NIP-05 field. As explained in Step 1, Nostr identifiers look like email addresses. They consist of three components; a username, SLD, and TLD. Using our example identifier, the NIP-05 field entry would be nostrich@nostrsovrn.com. Be sure to save your profile settings once you've entered your new identifier.
2. In your Nostr client, navigate back to your profile page, which should now display a check mark and/or your identifier domain. If it doesn't, go back to the NIP-05 field in your Nostr profile settings and make sure that there are no extra spaces preceding or following your identifier. If there are, remove them and re-save your settings. Now close and restart your Nostr client (even if there weren't any extra spaces).

Congratulations, you're now a self-reliant, sovereign Nostrich! 🤙

To add additional functionality to your new address, complete the optional steps below, starting with Step 8: Lightning configuration
1. From the home page of your hosting plan dashboard, open your control panel. If you're using Namecheap, go to your account dashboard, click on the 'Hosting List' tab and then on the 'GO TO CPANEL' button (or simply return to your control panel tab if you kept it open after completing Step 5).
2. In your control panel, locate the 'FILES' section and click on the 'File Manager' link.
3. In the file manager, open the main/root folder of your identifier domain (if you're using Namecheap and your identifier domain is your main and/or only domain, you are already in the root folder). Now right-click on the '.htaccess' file and then click on the 'Edit' button.
4. Open this template file and copy the short code snippet it contains, then paste it into the '.htaccess' file (below the existing contents). Now, replace 'YOUR_NOSTR_USERNAME' with your Nostr username (the first part of your identifier). Using our example identifier, that would be nostrich.

5. Next, replace 'YOUR_LIGHTNING_WALLET_ID' with the first part of your actual Lightning wallet address, as determined by your Lightning wallet client. The code snippet in the template file is based on Lightning forwarding for Wallet of Satoshi. If you'd like to set it up for a different client, it's usually just a matter of replacing 'walletofsatoshi.com' with the domain name of your Lightning client (but you should consult your Lightning client developer about this beforehand). Be sure to save the file when you're done.
6. In your Nostr client, go to your profile settings and enter your Lightning forwarding address into the (Bitcoin) Lightning address field. Remember, your Lightning forwarding address looks exactly like your Nostr identifier. Using our example identifier, the Lightning field entry would be nostrich@nostrsovrn.com. Be sure to save your profile settings once you've entered your new Lightning deposit address.

1. From the home page of your hosting plan dashboard, open your control panel. If you're using Namecheap, go to your account dashboard, click on the 'Hosting List' tab and then on the 'GO TO CPANEL' button (or simply return to your control panel tab if you kept it open after completing Step 5).
2. In your control panel, locate the 'EMAIL' section and click on the 'Email Accounts' link. On the next page, you will see a panel titled 'CREATE AN EMAIL ACCOUNT' . Your identifier domain should be preselected in the 'Domain' drop-down list (if not, select it).
3. In the 'Username' field, type your username (the first part of your identifier). You can now already see that your email address matches your Nostr address.

4. Next, in the 'Password' section, click on the 'Generate' button to create a strong password for your new email address (or create a strong password yourself). Be sure to store your password securely. Next, locate and click on the 'Edit Settings' button and set your email address storage space to 'Unlimited'. Now click on the blue '+ Create' button.

5. In the 'Email Accounts' panel, you will now see your newly create email address, which is already working. Click on the 'Check Email' button. You will now be taken to your email dashboard, where you will see various email account settings that you may find useful, including 'Forwarders' (allowing you to forward incoming emails to other email addresses) and the ability to set up access to your new email account on mobile devices.

6. Lastly, click on the blue 'Open' button to open your email inbox. If you'd like to skip your email account settings and go straight to your inbox next time you log in, simply tick the 'Open my inbox when I log in' box.
